


How to grow a garden from scratch
Part one: starting your seeds

The first rule of gardening is don’t overthink it. While seed packets, nurseries, and online communities might suggest a half-dozen different ways to start your garden on the right foot, it’s important to remember that plants have been keeping themselves alive and thriving for far longer than we have had our hands in the process.
Gardening — whether big or small, ornamental or fruit-bearing — will be fun. Through every season, you will come to appreciate the uniqueness of your yard, your soil, your growing skillset, and your vision for a backyard oasis. There is no perfect strategy and, like any good relationship, you’ll learn to trust in and communicate with your garden as it sprouts, flowers, and eventually wilts away to make space for next year.
Gardening in Edmonton presents a unique challenge. Our growing season is relatively short and is impacted by extreme heat and cold weeks. Unlike some climates where plants thrive outdoors year-round, in Albertan we can ensure timely harvests by starting plants indoors before transplanting them to an outdoor space.
This article discusses selecting and starting seeds indoors regardless of budget or experience level. Watch for upcoming articles that will walk you through the next steps in growing food!
Starting plants indoors requires a gentle hand. In the wild, a seedling can self-regulate to adapt to changing conditions. Indoor environments remove variables like wind, temperature swings, and pest pressure that make the plants hardy. A benefit is reliable germination, but the downside is that our plants must be handled carefully.
First, select your growing medium. Seedlings require soil that is rich in nutrients, airflow, and hydration. If that sounds contradictory, you’re not wrong. I felt overwhelmed the first time I read that the soil had to be both moist and well-draining. In fact, I felt like everyone knew something I didn’t about how soil worked! Modern gardening stores give you everything you need for healthy starter soil.
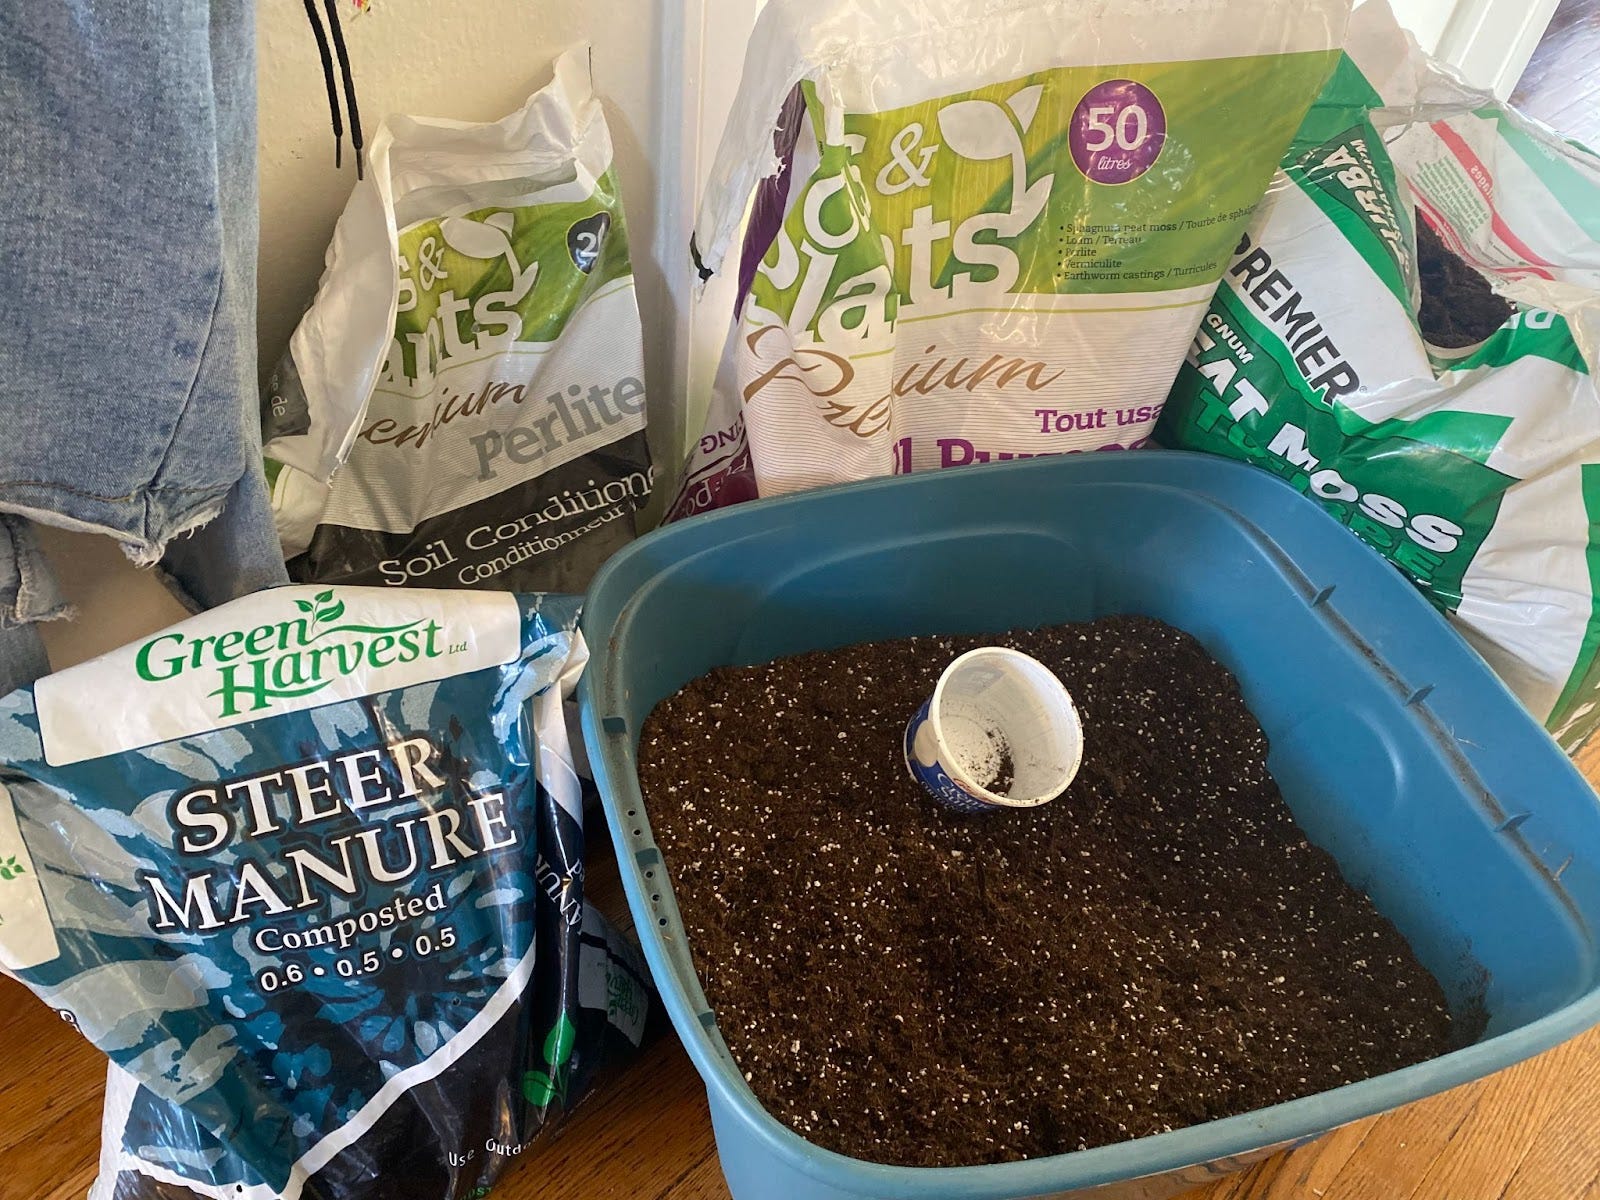
I recommend buying a bag of pre-mixed seed starters for first-time seed starters. These bags contain a healthy mixture of peat moss (provides structure and drainage), perlite (retains water without dampening soil), compost (nutrient-rich additives), and anti-bacterial compounds (prevents mold from overwhelming your young plants).
Seed-starter bags are relatively inexpensive and available from hardware stores and independent retailers like Apache Seeds or Zocalo in McCauley. As your skills and confidence grow, you’ll be able to mix custom starters that are uniquely suited to the plants you choose to grow. Grabbing soil from the garden is not a good choice, as it will be full of insect seeds, bacteria, and fungus that will take over your growing pots before your seeds can sprout.
Second, pick your potting setup. Potting is where creativity and frugal thinking can be great options for hesitant gardeners. Anything that holds soil, won’t fall apart immediately, and is small enough for the plant to develop a dense root system is fair game.
Indoor plants struggle with long-term growth when planted in a large container. If the container is too large, the young plant cannot absorb enough moisture from the soil, and that waterlogged soil becomes a perfect place for anaerobic bacterial growth. On the other hand, a container that is too small will need to be watered constantly, and if allowed to dry out completely, will stress the plant into growing without producing fruit. Yikes!
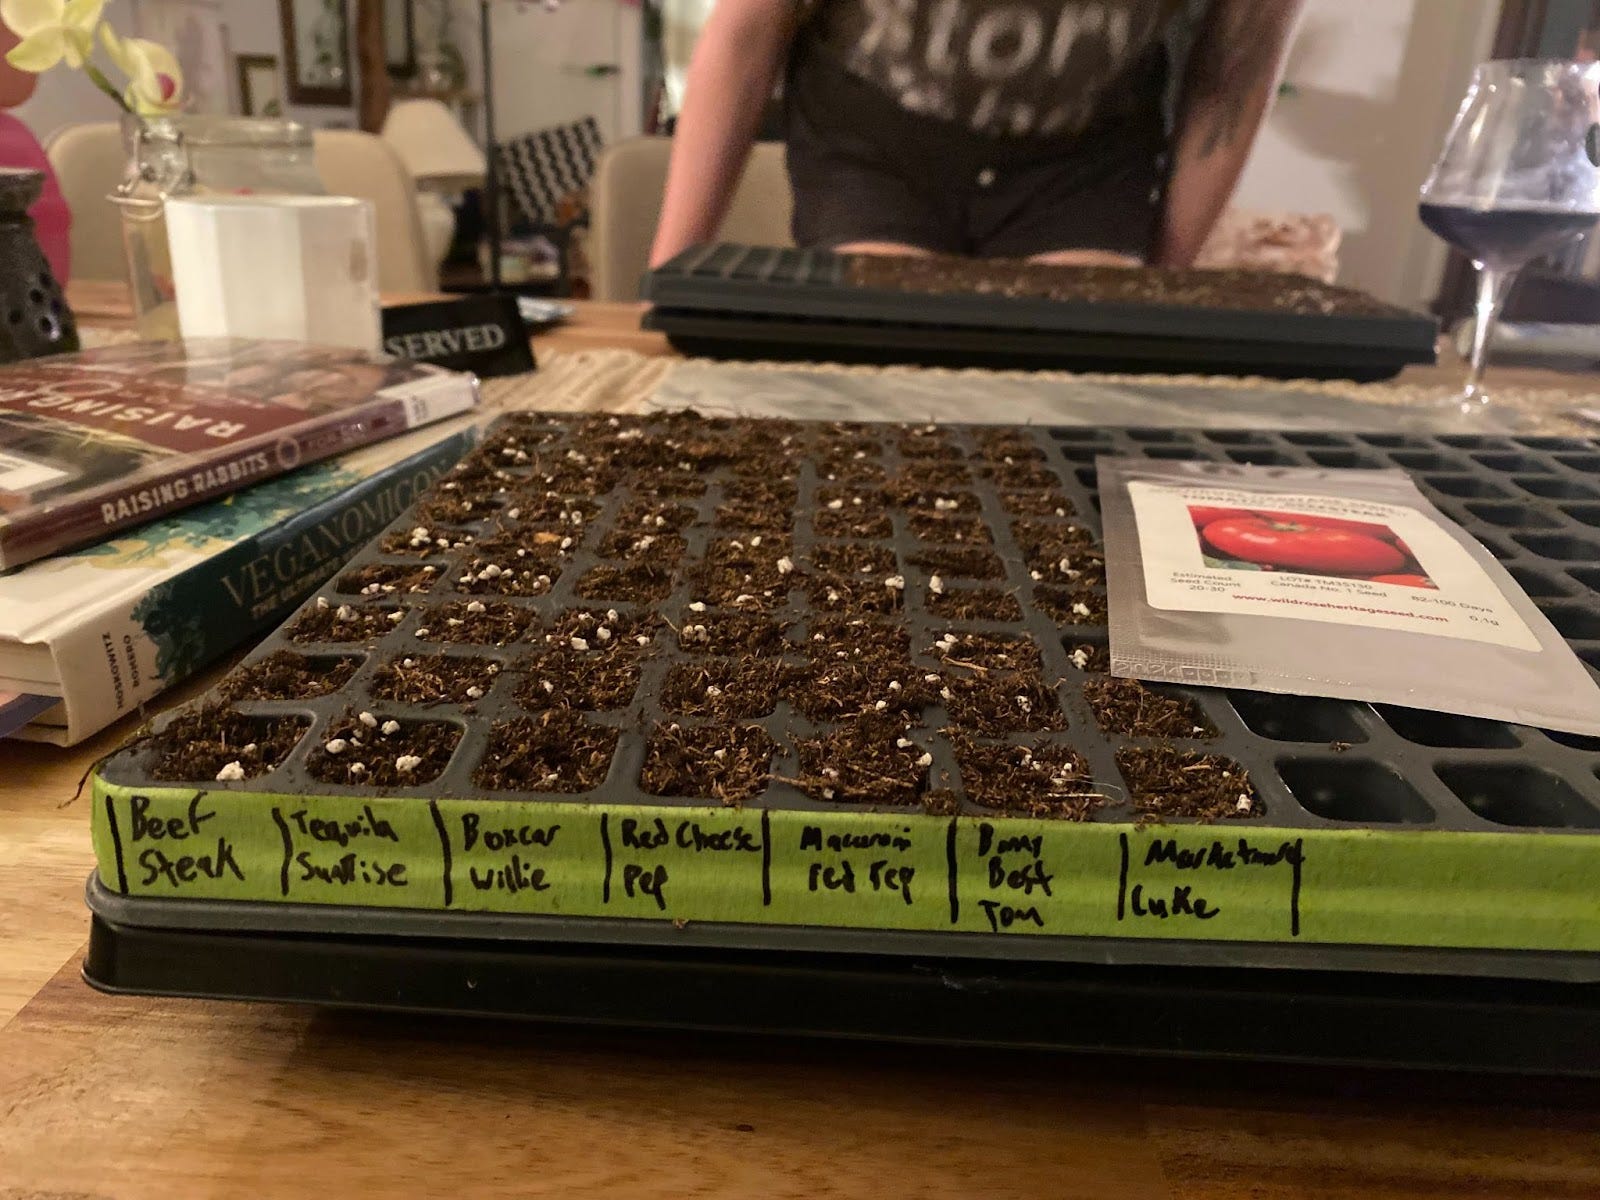
There are many options for finding that middle ground. Commercial seed-starting trays are sized appropriately for young plants and feature drainage and lid features to help manage moisture. Compostable pots are excellent for transplanting, as they are buried directly into their final growing spot without disturbing the roots. The best starter of all is seed blocks, which do not contain plastic and have no ongoing costs after the initial equipment purchase.
Upcycled options for seed trays include egg cartons, empty toilet paper rolls, clean yogurt cups, dairy tubs, or any plastic container you can think of. Styrofoam from grocery store meats is durable and a great way to reduce waste. Just be cautious not to introduce an unnecessary amount of plastic or ink into your pot. Too much ink or protective coating could draw unwanted chemicals into your plants.
Once you’ve picked your soil and filled your pots, it’s time to sow some seeds! Begin by poking holes a few centimeters deep and drop two or three seeds into each of your containers. By over-planting, you increase the overall chances of success per pot and allow yourself to thin out the crowd later, or transplant only the strongest seedlings into a bigger pot when the time comes.
Not all seedlings do well when started inside and moved outside (also known as transplanting). Beans, peas, and root crops like carrots or beets often succumb to transplant shock and will die when repotted or moved outside. If this is your first year starting indoors, stick to beets, broccoli, cabbage, chard, collards, lettuce, strawberries, eggplant, peppers, or tomatoes for the best chance of a healthy crop.
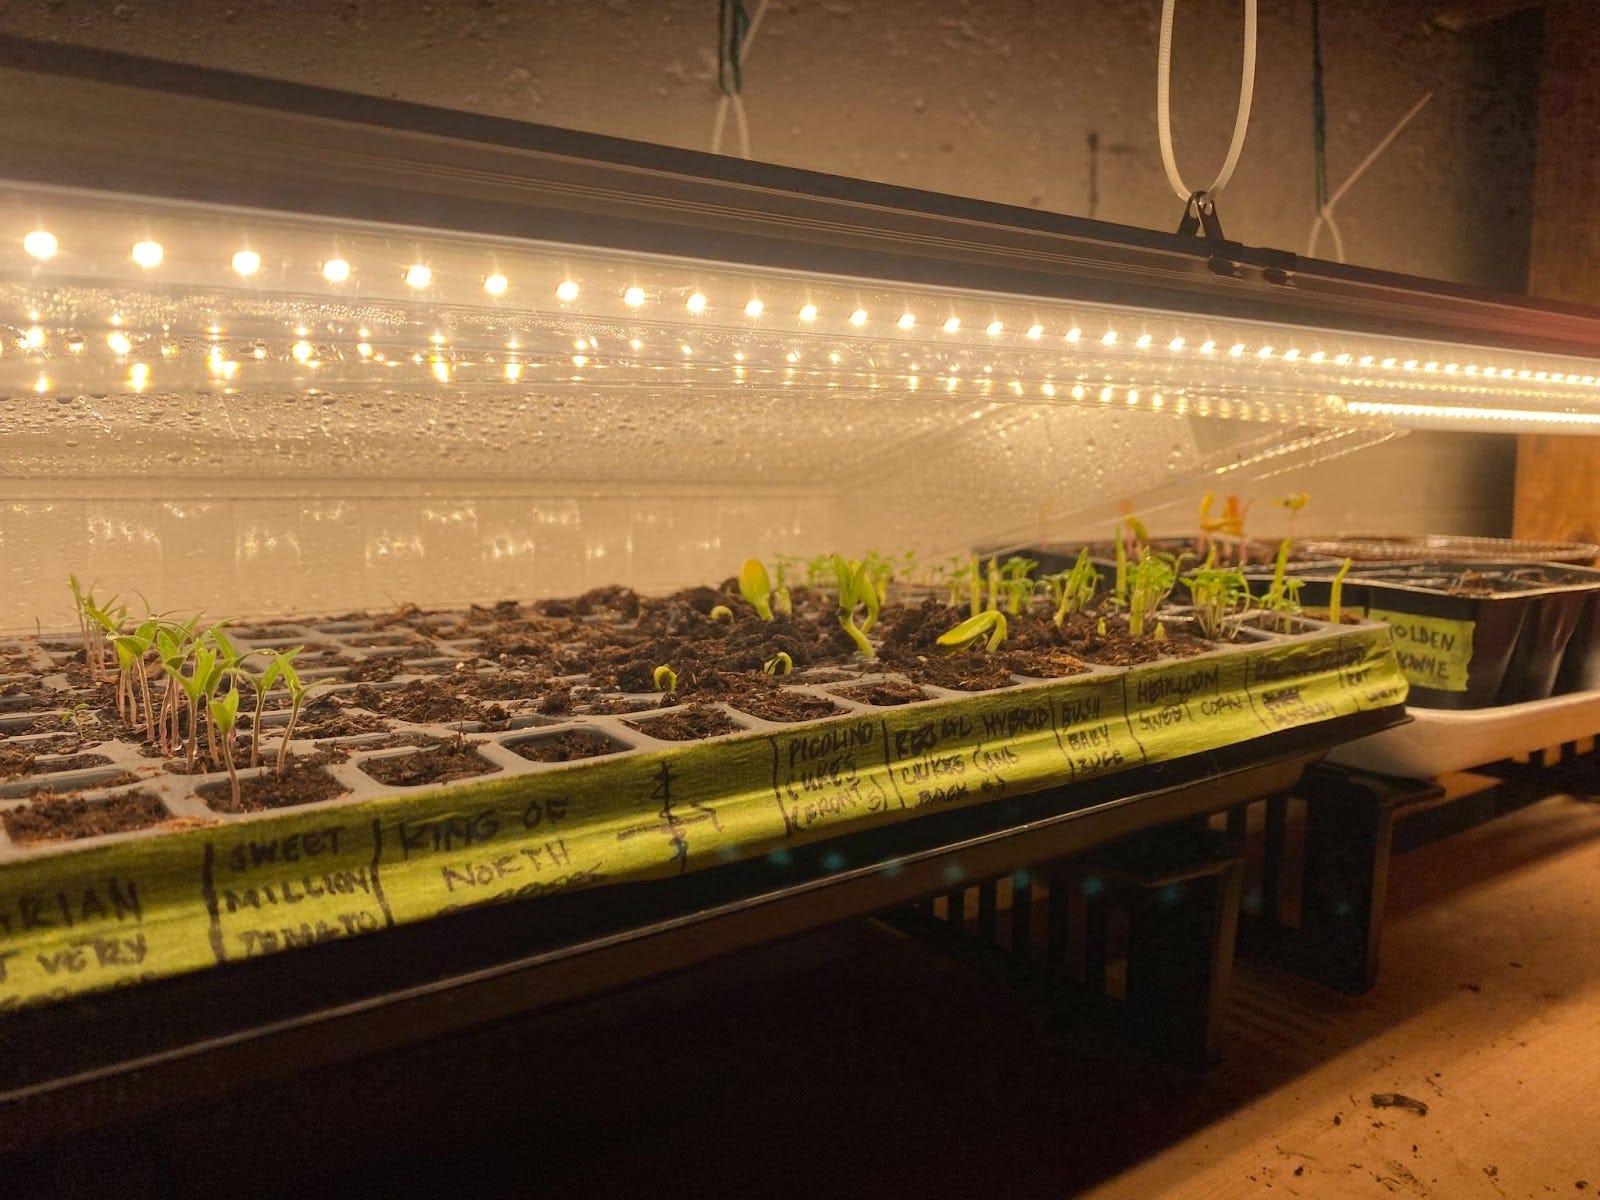
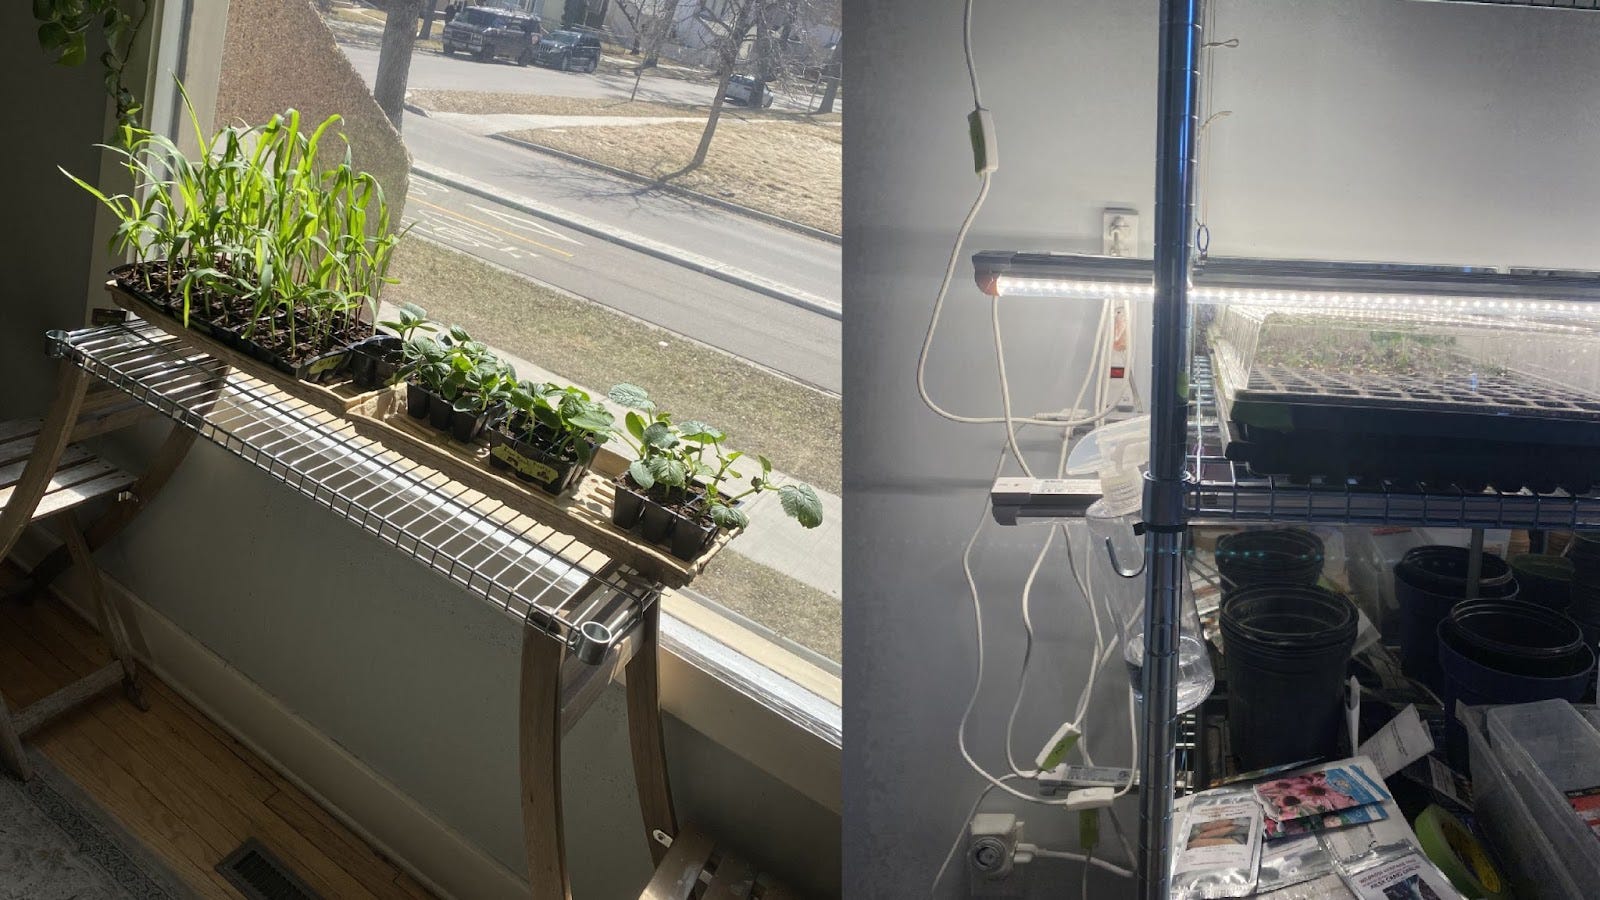
Lastly, let’s discuss lighting. The most significant up-front cost for a gardener looking to grow a large number of starters is going to be artificial lighting. Grow lights come in all shapes and sizes, and not everyone will have access to the best of the best options. No matter what you have access to, you can’t go wrong with following a couple of simple rules.
Firstly, starters thrive with sixteen hours a day of light. The simplest way to meet that requirement is to invest in a digital timer to handle your lighting on a customized schedule. Secondly, your light source must be as close to your seedlings as possible—almost touching them. Even high-quality full-spectrum grow lights are not nearly as powerful as the sun and must overcome their low output by being as close as possible to young plants.
If you don’t have electric grow lights, you still have access to the best lamp of all—the sun. A south-facing window is the perfect place to give young plants the boost they need.
With good soil, daily misting, and access to a healthy light source, your starters should poke up and out of the soil within the week! From there, monitor your seedlings for signs of struggle—usually caused by overwatering (wilting, sickly plants) or insufficient light (long pale stems and very few leaves).
To echo the advice at the start of this article, don’t overthink it. Gardening is a mixture of successes, failures, triumphs, and disappointments. Like us, our gardens will never be perfect. Still, we can learn, grow, and chase opportunities to thrive — reaching every day for light.
Our next article on starting your garden will look at strategies for moving your starters to bigger pots and getting ready for a healthy transplant in the spring.
https://bcfoodhistory.ca/hbc-gardens-garden-seeds/
The security system in your comments is rather difficult. It's a great site, but I have to re-authenticate every time.
This is a great article. You might be interested in a post about HBC gardens. See or search out https://bcfoodhistory.ca/hbc-gardens
Mary Leah - Pocketgardenyeg